
Globe and Mail Yoga Basics
I’m excited to announce that I’ve teamed with the Globe and Mail to produce a series of online Yoga Basics videos!
The videos are short (~2min long) and offer guided instruction into a variety of poses, each with a specific focus (ie yoga for ankle strength).
Check out the teaser here:
Filmed and edited by the lovely Amanda Palmer
Originally Toronto based, yoga basics has expanded to the West Coast and I am very fortunate to host the Vancouver series.
I was approached to do the series via instagram by Amanda and Shannon. After a skype interview with Shannon at the Globe and Mail’s Toronto office, we arranged to do a test shoot. We wanted to showcase Vancouver’s beauty, so we choose Kits beach as the location for the shoot.
I wrote scripts that Amanda and Shannon helped me edit via email exchange. The entire process, from script writing to working on camera, was new to me. To practice, I recorded myself reading the script on my macbookpro cam. Speaking on camera was surprisingly much more difficult than I had anticipated. I expected camera work to be less intimidating than teaching yoga to a class of students, but it actually felt much more uncomfortable for me.
For the shoot, we prepared 4 scripts and filmed them on one of the few Sunny days in over a week in Vancouver. The filming took approx 5hrs, however I believe because it was my first time working on film it took longer than it could have. I was nervous and fumbling my words but after the first two shoots started to get more comfortable. The whole process was an incredible learning opportunity for me and a lot of fun! I feel very grateful for this opportunity and can’t wait to do more yoga video projects in the future!
Amanda has done a great job editing the clip, you can check out the first video here!
Why is shavasana so important?
शवासन
{Shavasana}

Shavasana, or corpse pose, is the relaxation pose that comes at the end of our yoga practice. Due to studio time constraints, more teachers are cutting shavasana short. Busier lives means some students have to rush for the door early, skipping this essential relaxation. It is often these people who can benefit most from it. In today’s high paced and over stimulated society, many people have forgotten how to relax.
Click to read full
What is Shavasana?
Shavasana appears to be one of the simplest postures, but many students often find it the most challenging. After we have moved through a series of asanas, or physical poses, the body needs time to consolidate and rebalance. In shavasana, the body can fully relax. With the palms face up and the arms and legs at approximately a 45 degree angle from the body, the joints are able to relax in their sockets. This also temporarily frees our muscles from the physical stress of supporting all of our bones and organs.
Benefits of Shavasana
Shavasana has many physical benefits.
Some of which include:
- Improved sleep
- Nervous system recovery
- Decreases blood pressure and heart rate
- Release of lactic acid build up
- Reduced anxiety
- Reduced acute & chronic stress
- Improved concentration
- Increased energy levels
- A stronger immune system

Bringing awareness inward
Shavasana is not just a time to nap, it is a meditation. What makes it so challenging is that it requires us to relax while remaining aware and conscious. It is an excellent tool to increase awareness of your body, which in turn can also strengthen your yoga practice. During shavasana we systematically bring our awareness through our physical body, acknowledging any tensions and releasing them. Once the physical body is relaxed we shift our awareness to the mind.
The eyes are closed to limit sensory distractions and allow us to turn our awareness inward. Focusing on the natural rhythm of the breath is an excellent way to keep the focus on the present moment, preventing it from running away with the stories the mind wants to tell.
Still not convinced?
It is important to allow ourselves to relax, especially after a yoga class when we have just worked our physical body. Yoga is more than just a physical experience of asanas; it is a union, through breath and meditation, of our physical body, spiritual body and our minds. Shavasana is meditation, it is a time for the chatter of our mind and the stories we tell ourselves to dissolve. To focus inward, to visualize, dream and to surrender. You may be surprised what happens when you do.
Resources:
International Journal of Yoga article: Exploring the therapeutic effects of yoga and its ability to increase quality of life
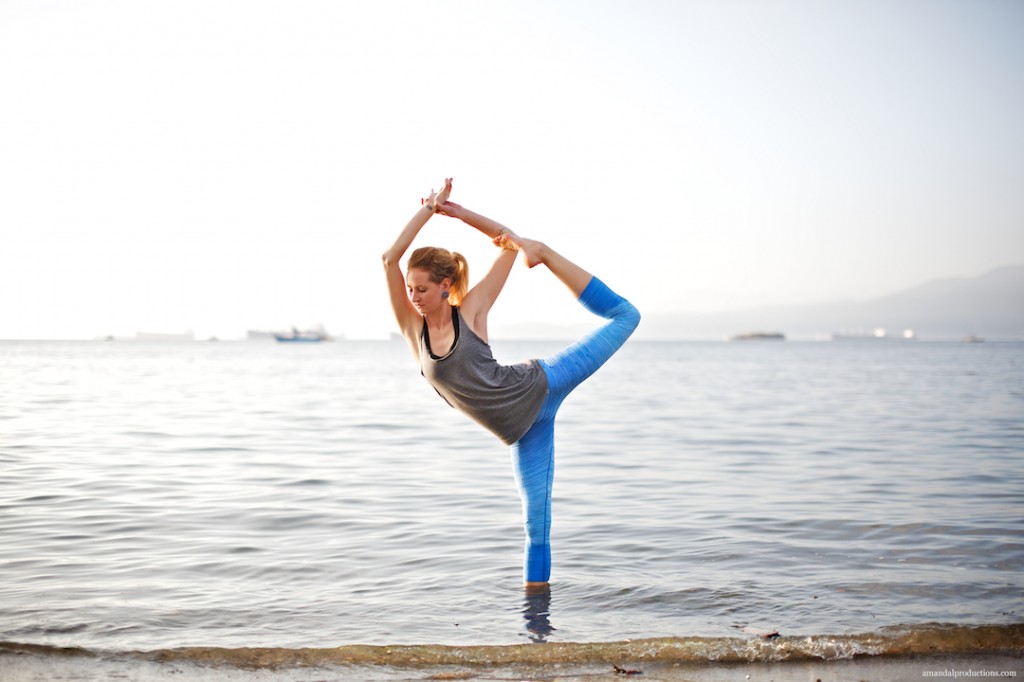
Kitsilano Beach Photo Shoot
On Wednesday the lovely and talented Amanda Palmer took some photos of me at Kits Beach.
The fog lifted just as we arrived and the sun came out, creating the perfect lighting for the shoot!


Khalsa Ladies Camp: What is Kundalini Yoga?
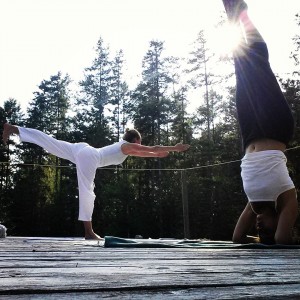
 I have been practicing Kundalini yoga for just over 2 years, so I am relatively new to it. In August I attended the Yoga West Khalsa Ladies Camp on the Sunshine Coast. Khalsa Ladies camp is a five day women-only camp of Kundalini Yoga, Meditation and workshops (ie on relationships, healthy breast and creative writing).
What is Kundalini Yoga?
 Kundalini, often called the yoga of awareness, is a form of Yoga that was brought to the west by Yogi Bhajan in 1968. Instead of focusing primarily on the asanas (the physical form of yoga), Kundalini yoga involves a combination of meditation, pranayama (breathing exercises), and the chanting of mantras. There is an emphasis on balancing and strengthening the nervous system to help direct and control the kundalini energy as it rises from the base of the spine to higher energy centers/chakras of the body.
Links: Kundalini, often called the yoga of awareness, is a form of Yoga that was brought to the west by Yogi Bhajan in 1968. Instead of focusing primarily on the asanas (the physical form of yoga), Kundalini yoga involves a combination of meditation, pranayama (breathing exercises), and the chanting of mantras. There is an emphasis on balancing and strengthening the nervous system to help direct and control the kundalini energy as it rises from the base of the spine to higher energy centers/chakras of the body.
In kundalini, there is less focus on the precise alignment of each pose. Often the postures can be quite intense and involve repetitive movements for long periods of time. For these reasons, I believe it is very helpful to have a base knowledge of (Hatha) Yoga when starting Kundalini.
Sikhism
Yogi Bhajan was a Sikh and in his teachings incorporated many ancient Sikh stories. The women who held the Khalsa camp were also of Sikh religion. Although many aspects of the camp could be considered religious, everyone was welcomed and invited to participate in Sikh activities such as Gurdwara if they wanted to.
Khalsa Camp
Morning Sadhana:
Every morning at the camp we participated in Sadhana. Sadhana is an early morning (3:30am wake up!) meditation that involves chanting, yoga asanas and readings from a sacred yoga text. It’s a beautiful way to start and set the energy of the day.
Rebirthing
A major theme of the workshops and yoga sets was ‘Rebirthing’. The rebirthing courses were designed by Yogi Bhajan to help students clear the clutter of the mind and let go of any pain or fear they may be holding onto. Each rebirthing set was taught by a different teacher. Certain teachers or sets resonated differently with each individual depending on what kind of subconscious blocks they were dealing with.
My experience
 The rebirthing sets were quite different from what I had expected. Coming into the experience, I told myself I had unresolved anger to deal with which I expected to surface during the rebirthing sets.
What actually happened surprised me. I felt no anger, no sadness, only contentment and a sense of deep connectedness with my “true” self. A self that was unaffected and undisturbed by any event that had happened in my life. For some of the women the rebirthing was very intense and difficult. There were often tears, moaning, sighs and screams of release during the sets.
The first few days at camp were the most difficult for me. But once I acknowledged the judgement and scepticism I felt, I was able to recognize that each one of these ladies was on their own journey-finding meaning in the ways that made sense to them. I surrendered deeply to the practices that resonated with me, while also acknowledging and accepting that some of the practices at the camp weren’t for me. Once I realized this I was able to graciously enjoy the entire experience.
 I anticipated the camp to be quite intense. To be honest, the idea of a large group of women together in the woods kind of frightened me. But after a few days I found a sense of community and union at camp Raj. In the mountains, out of cellular reception and away from any obligations or roles the women hold in their lives, we opened up and let ourselves be vulnerable, real and raw.
Our purpose for holding this camp is not to give answers or solutions, but rather to create a nurturing environment through which one can grow and heal and find her own way.”
-Khalsa Ladies Camp About page
Yoga West
For more information about Kundalini Yoga: 3HO Kundalini Organization
Four poses to increase hamstring flexibility
A common struggle for many yoga students is hamstring flexibility. Active people often have tight hamstrings, which can limit your yoga practice and cause you to compromise your lower back in many poses. The key to improving your practice and hamstring flexibility is patience and practice, however there are some poses which are especially effective in getting you there a little faster.

The mini flow outlined below takes you through 4 poses that, if practiced frequently, will give you noticeable results. Start on the Right side, then do the entire flow again on the Left side. Hold each pose for as long as desired, the longer you hold, the deeper into the stretch you will get.
1) Extended Triangle Pose {Utthita Trikonasana}
This pose targets the thighs and helps to increase flexibility in the hamstrings, groin and shoulders. The slight twist stimulates the organs in your abdomen, which can improve digestion.
How to get into Utthita Trikonasana:

- Start in Mountain pose/Tadasana (simply standing, feet hip width apart, at the front of your mat)
- On exhalation, step your left foot back at a 45º angle, coming into Warrior 2 pose with your arms extended in line with your shoulders and parallel to the floor, palms down
- Right foot is in front, knee bent at 90º (careful not to bring the knee forward over your right foot)
- Transition to triangle pose by straightening your right leg, keeping the right knee in line with your right ankle
- On your next exhalation reach toward the front of your mat, moving your torso forward while keeping in line with your right leg, you should be moving from your hips (not waist)
- Root down through your left foot, keeping the left leg straight and strong while pressing the heel of your foot down
- Rotate your torso to the left, leading this movement with your left shoulder, keep both sides of your torso long
- Bring your right hand down on your shin, ankle, foot or floor (maintaining length in both sides of your torso)
- Extend the left arm towards the sky, fingers together pointing upwards and shoulders in one line
2) Intense Side Stretch {Parsvottanasana}
This pose targets your outer hamstrings and can also help stretch out your IT band (aka iliotibial).
How to get into Parsvottanasana:

- From Extended triangle pose; exhale (gazing at the right foot) and slowly lower your fingertips on your left hand to the floor on the inside of your right foot while rotating your torso to the right, right fingertips on the outside of your right foot (if you cannot reach the floor place two blocks on either side of your right foot)
- Square your hips by turning the heel of your left foot (your back leg) so that it is in line with the toes and pointing towards the front of your mat (the same direction as your right foot)
- Adjust the distance between both feet so that you can comfortably straighten both legs, keep feet hip width apart and press down through the big toes and heel
- Firm your thighs, slightly squeezing them inward as if you are holding a block between them
- Ensure both knee caps are in line with the ankle of the corresponding leg
- Check your hips, they should be in line parallel to the front of your mat, make sure you’re not rotating the pelvis reaching one hip toward the front more than another
- Keep your torso parallel to the floor over the right extended leg, reaching forward from the grion/hips
- Inhale and on your next exhale slowly lower your torso as close as is comfortable towards the right thigh
3) Low Lunge {Anjaneyasna}
This pose targets your groin and thighs, the deeper you sink into your hips the deeper stretch.
How to get into Anjanevasana:

- From Intense Side Stretch; bring your gaze to the floor just past the toes on your right foot
- Press the big toe and heel of your right foot firmly into the ground, exhale and slowly shift your weight forward, bending the right knee and moving your torso over the right thigh
- Stop when your right knee is at a 90º angle, knee directly above your right ankle
- Keep the right knee fixed in this position and slide the left foot away from you while lowering the left knee to the floor, you should feel a nice stretch in the thigh and groin (if there is any pain, shorten the distance between your left knee and right foot)
- Flatten the left foot so that the top of the foot is on the floor
- From here you can place both hands on the inside of your right foot, for a deeper stretch lower your forearms to the floor (watch that the right knee does not extend over the right ankle towards the front of your mat)
- Lift your chest and firm your shoulders blades, as if you are squeezing a pencil between them
4) Half Front Splits {Ardha Hanumanasana}
This Pose strengthens your hamstrings and focuses on your hips, hamstrings and calves.
How to get into Ardha Hanumanasana:

- From Low Lunge; place your right hand on the outside of the right foot, left hand on the inside
- Inhale and lift your torso up at the same time lifting your right toes off the mat and shifting the weight to your right heel, flex your foot
- Slide your left knee forward on the mat so that it is directly under your hips
- Bring your torso stacked on top of your pelvis, hands on your hips and spine in a straight line
- Square your hips with the front of your mat
- Engage the muscles of your thigh and core
- Moving from the pelvis, exhale and slowly fold over your right thigh, placing your hands on the floor (or on blocks) on either side of your extended leg
- Check in with your hips, make sure they are even by pressing the right hip back and drawing the left hip slightly forward
- Breathe deeply, and when you’re ready, inhale bring the right knee forward to a 90º angle
- Tuck the toes on the left foot under, and lift the left knee of the mat transitioning into lunge
- Step the right foot back, transitioning into downdog